


![]()
สไตลัสอัจฉริยะสำหรับการเขียน จดบันทึก และจดบันทึกประกอบสำหรับ Windows Ink ทำตาม 4 ขั้นตอนง่ายๆ 4 เพื่อตั้งค่า Bamboo Ink ของคุณ หรือดูวิดีโอนี้


คำแนะนำทีละขั้นตอนง่าย ๆ เกี่ยวกับวิธีตั้งค่า Bamboo Ink และการเริ่มใช้งาน Windows Ink (คุณสมบัติของปากกาที่ไวต่อแรงกด ใช้งานง่ายและรวดเร็วในอุปกรณ์ Windows 10)
![]()
สไตลัสอัจฉริยะสำหรับการเขียน จดบันทึก และจดบันทึกประกอบสำหรับ Windows Ink ทำตาม 4 ขั้นตอนง่ายๆ 4 เพื่อตั้งค่า Bamboo Ink ของคุณ หรือดูวิดีโอนี้
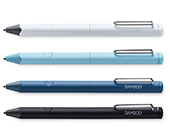
หากคุณมี Bamboo Ink รุ่นใหม่ล่าสุดดังภาพด้านบน ให้เริ่มการตั้งค่าโดยคลิกด้านล่าง
ดูต่อที่นี่หากคุณมี Bamboo Ink รุ่นก่อนหน้าดังภาพด้านบน ให้เริ่มการตั้งค่าโดยคลิกด้านล่าง
ดูต่อที่นี่ในการตรวจสอบว่าอุปกรณ์ Windows ใช้งานร่วมกับ Bamboo Ink ได้หรือไม่ ให้ดูรายชื่อของอุปกรณ์ที่ผ่านการทดสอบได้ที่หน้านี้
เพื่อประสบการณ์การใช้งานที่ดีที่สุด เราแนะนำให้คุณอัปเดตไดรเวอร์ของอุปกรณ์ Windows ของคุณ คลิกที่นี่เพื่อดาวน์โหลด “Bamboo Ink stylus” ไปยังอุปกรณ์ของคุณ โปรดทำตามคำแนะนำที่ปรากฏบนจอ
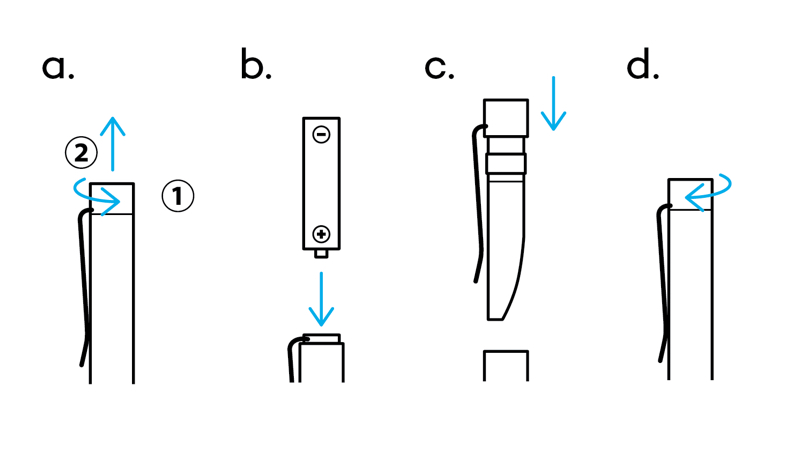
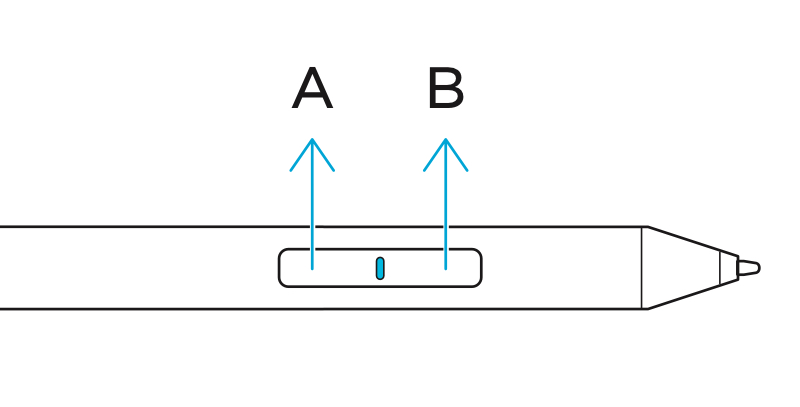
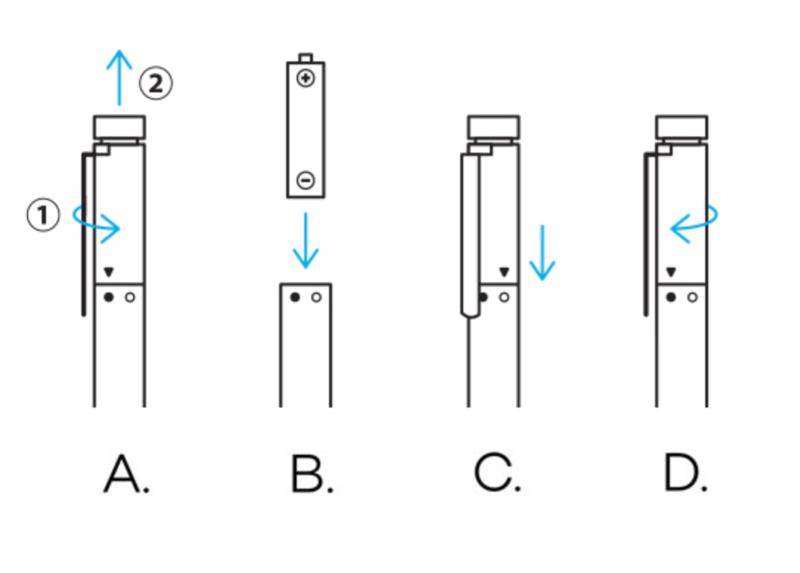
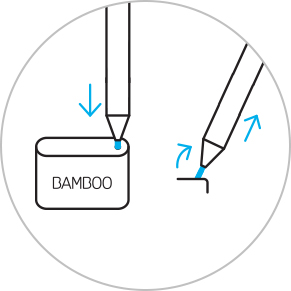
หมุนปลายด้านบนของ Bamboo Ink เพื่อปลดล็อก เปิดปลายเพื่อใส่แบตเตอรี่ตามที่ระบุไว้ แล้วปิดโดยหมุนปลายด้านบนเพื่อล็อก
โปรดตรวจสอบให้มั่นใจว่าคุณได้ใส่แบตเตอรี่โดยเอาด้าน "-" ขึ้น
ในการตรวจสอบว่าอุปกรณ์ Windows ใช้งานร่วมกับ Bamboo Ink ได้หรือไม่ ให้ดูรายชื่อของอุปกรณ์ที่ผ่านการทดสอบได้ที่หน้านี้
อุปกรณ์บางชนิดต้องมีการอัปเดตไดรเวอร์ ในการตรวจสอบว่าอุปกรณ์ของคุณต้องอัปเดตไดรเวอร์หรือไม่ ให้ดูที่รายชื่อด้านล่าง หากไม่มีอุปกรณ์ของคุณอยู่ในรายชื่อ กรุณาดำเนินต่อด้วยขั้นตอนที่ 2 หากมีอุปกรณ์ของคุณอยู่ในรายชื่อนี้ กรุณาคลิกที่นี่เพื่อดาวน์โหลดไดรเวอร์ "Bamboo Ink stylus" สำหรับอุปกรณ์ของคุณ บันทึกไว้ในอุปกรณ์ของคุณ แล้วคลิกสองครั้งที่ไฟล์เพื่อติดตั้งไดรเวอร์ กรุณาปฏิบัติตามคำแนะนำในหน้าจอ
หมุนปลายด้านบนของ Bamboo Ink เพื่อปลดล็อก เปิดปลายเพื่อใส่แบตเตอรี่ตามที่ระบุไว้ แล้วปิดโดยหมุนปลายด้านบนเพื่อล็อก
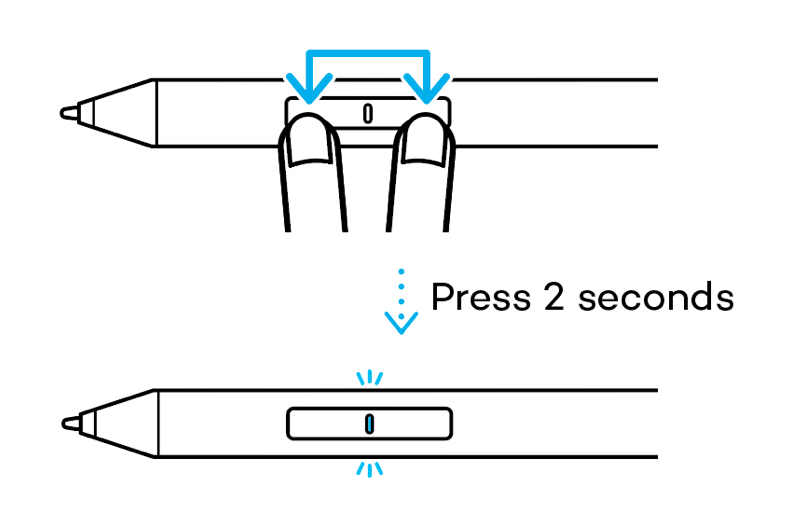
Bamboo Ink รองรับโหมดความเข้ากันสองโหมด โหมดที่เลือกต้องตรงกับโหมดของอุปกรณ์ Windows ของคุณ หากสไตลัสไม่ทำงานบนอุปกรณ์ของคุณ ก็สามารถสลับโหมดได้อย่างง่ายดาย
กดปุ่มทั้งสองข้างค้างไว้พร้อมกันเป็นเวลาสองวินาทีเพื่อสลับระหว่างโหมด ทำซ้ำเพื่อกลับไปยังโหมดก่อนหน้า
1. ในเดสก์ท็อป Windows 10 คลิกที่เริ่มต้น (Start) เลือกการตั้งค่า (Settings) ไปที่อุปกรณ์ (Devices) เลือกบลูทูธ (Bluetooth) และเปิดใช้งาน
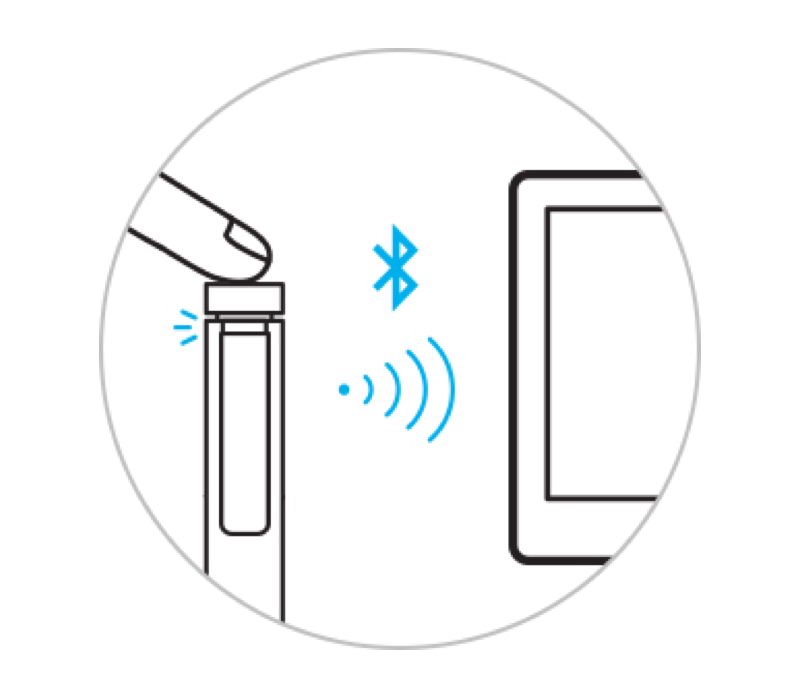
2. ตอนนี้ที่ Bamboo Ink กดปุ่มด้านบนค้างไว้ประมาณ 6 วินาทีจนกว่าไฟ LED จะเริ่มกะพริบ
3. เลือก Bamboo Ink จากรายชื่ออุปกรณ์ที่พบและเลือกจับคู่

ในการเปลี่ยนหัวปากกาที่ใช้งานอยู่ สอดเข้าที่รูเล็ก ๆ ในเครื่องมือถอดหัวปากกาของชุดหัวปากกา เอียงสไตลัส แล้วถอดหัวปากกา
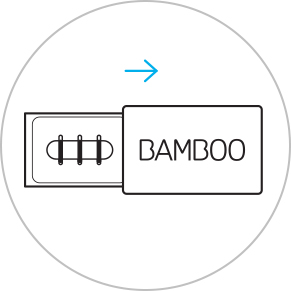
เลื่อนเพื่อเปิดชุดหัวปากกาและเลือกจากซ้ายไปขวา: แข็ง (สีดำ) ปานกลาง (สีเทา) หรืออ่อนนุ่ม (สีดำ)
กดขึ้นไปเบา ๆ เพื่อติดตั้งหัวปากกาที่เลือก ตรวจสอบให้แน่ใจว่าหัวปากกาเสียบอยู่ในตำแหน่งที่เหมาะสม
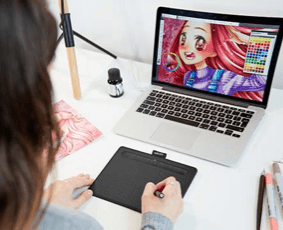
Sticky Notes กระดานร่างภาพ หน้าจอสำหรับร่างภาพ: Windows Ink Workspace มาพร้อมกับแอปฯ 3 รายการที่ติดตั้งไว้ล่วงหน้า ที่จะช่วยให้คุณสร้างสรรค์แนวคิดได้อย่างต่อเนื่องด้วย Bamboo Ink
Bamboo Paper เปลี่ยนอุปกรณ์ของคุณให้เป็นสมุดโน้ต รวบรวมความคิดและไอเดียต่าง ๆ รวมทั้งบันทึกข้อความ ร่างภาพ และวาดรูปได้อย่างตรงไปตรงมาและง่ายดายเหมือนใช้สมุดโน้ตจริง
Sticky Notes กระดานร่างภาพ หน้าจอสำหรับร่างภาพ: Windows Ink Workspace มาพร้อมกับแอปฯ 3 รายการที่ติดตั้งไว้ล่วงหน้า ที่จะช่วยให้คุณสร้างสรรค์แนวคิดได้อย่างต่อเนื่องด้วย Bamboo Ink
ผลิตภัณฑ์ Wacom ทั้งหมดสามารถทำความสะอาดได้อย่างปลอดภัยด้วยไอโซโพรพิลแอลกอฮอล 70 หรือ 75 เปอร์เซ็นต์ (รับบิ้งแอลกอฮอล์) โดยใช้กับผ้านุ่มที่ไม่เป็นขุย ใช้ผ้าชุบน้ำหมาดเช็ดเบา ๆ บนพื้นผิวที่แข็ง และไม่มีช่องของผลิตภัณฑ์ Wacom เช่น จอแสดงผลหรือพื้นผิวภายนอกอื่น ๆ อย่าใช้น้ำยาฟอกขาว หลีกเลี่ยงการทำให้ช่องที่เปิดเปียกชื้น และห้ามจุ่มผลิตภัณฑ์ Wacom ลงในสารทำความสะอาดใด ๆ ดูเคล็ดลับเพิ่มเติมด้านล่าง หรือติดต่อทีมบริการลูกค้าของ Wacom ในภูมิภาคของคุณ
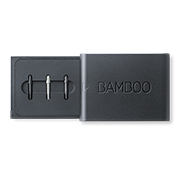
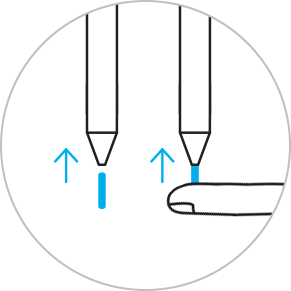
ชุดหัวปากกาสำหรับ Bamboo Ink ประกอบด้วยหัวปากกา 3 ประเภท คือ แบบอ่อน ปานกลาง และแบบแข็ง เพื่อให้คุณเลือกหัวปากกาที่มอบความรู้สึกสมจริงบนหน้าจอในแบบของคุณเอง เหมาะกับรูปแบบการเขียนของคุณ